
Quick Answer
Return or contact the seller before cutting the lace if the wig arrives with the wrong length, color, texture, cap size, lace type, construction, or density; if the lace is torn; if the hairline is extremely sparse or overly dense; if there is severe shedding straight from the box; or if the cap does not sit securely on your head.
Do not cut, bleach, pluck, wash, spray, glue, tint, or hot-comb the wig until you have taken photos and checked the return policy. Once the lace is cut, many sellers treat the wig as customized or worn.
Why You Should Inspect Before Cutting the Lace
Cutting the lace feels like the first step of installing a wig, but from a return-policy point of view it can be the point where the wig stops being “new.” Many sellers will still help with small issues after customization, but a full return is usually easier when the wig is untouched.
That is why the first ten minutes matter. You are not trying to judge whether the wig is perfectly styled. You are checking whether the wig you received matches what you ordered and whether there are defects you should report before changing anything.
This inspection is especially important for pre-cut, pre-plucked, pre-bleached, wear-and-go, glueless, and HD lace wigs because buyers often expect them to be ready immediately. Ready-to-wear still needs a basic quality check.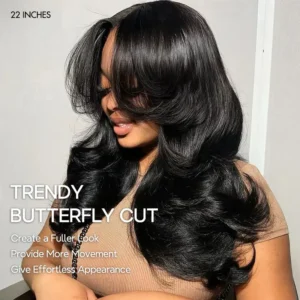
The 10-Minute Wig Inspection Checklist
Use clean hands, natural light if possible, and a white towel or plain background. Take photos and short videos while the wig is still in its original condition.
| Check | What Looks Normal | Return or Seller-Contact Red Flag |
|---|---|---|
| Order match | Length, color, texture, cap size, and lace type match the order | Wrong style, wrong length, wrong color, wrong construction, or missing features |
| Lace condition | Lace lies flat with no holes, tears, or hard melted areas | Torn lace, cut lace, frayed front edge, or visible damage before use |
| Hairline | Hairline has some gradual density and can be styled | Extremely dense wall of hair, bald patches, uneven ventilation, or missing hair at the front |
| Parting area | Part is visible but not empty | Part looks like a wide bald strip or has obvious gaps |
| Knots | Knots may be lightly visible up close | Heavy black dots, patchy bleaching, orange roots, or weakened roots |
| Cap fit | Wig sits evenly and feels secure without pain | Cap is much too small, too large, twisted, or cannot cover the intended area |
| Shedding | A few loose hairs from packaging | Clumps, continuous shedding, or hair sliding out with light touch |
| Smell | Light packaging or hair-processing scent | Strong chemical, mildew, smoke, or sour smell that suggests storage problems |
| Density | Overall fullness matches the listing and photos | Thin front, thin crown, uneven tracks, or density far below expectation |
| Packaging | Tags, net, and accessories are present if promised | Missing labels, damaged packaging, or signs the wig was previously used |
Step 1: Confirm the Wig Matches the Order
Start with the simplest check: did you receive the right wig?
Compare the wig with your order confirmation. Check the length, color, texture, parting style, lace size, lace color, density, cap size, and whether it was supposed to be glueless, pre-cut, pre-plucked, pre-bleached, closure, frontal, T-part, or full lace.
Do not rely only on the product name. Listings can use similar terms for different constructions. A “lace front” wig should not be treated the same as a T-part wig or small closure wig unless the listing clearly says so.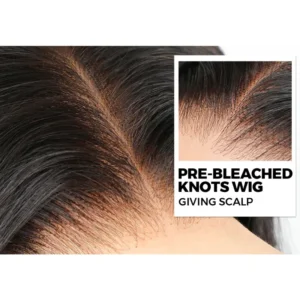
Step 2: Check the Lace Before You Put It On
Hold the lace up in good light. Look for holes, tears, stretched areas, stiff glue-like residue, discoloration, or uneven cutting if the wig arrived pre-cut.
HD lace and thin transparent lace can be delicate, but delicate should not mean damaged. If the lace is torn before installation, take photos immediately. A tear near the hairline can become worse once the wig is stretched over the head.
Step 3: Look at the Hairline and Part
A natural hairline usually has some variation. It should not look like a hard straight line, but it also should not have empty spots, missing hair, or a front edge that looks over-plucked.
Check the parting area too. A part can show scalp or lace, but it should not look like a wide bald path unless the style was intentionally made that way. If the front or part looks too thin before you do anything, do not try to fix it by adding more plucking.
Step 4: Test the Cap Fit Without Cutting Lace
Place the wig on your head gently with the lace still intact. Do not pull hard. Use the adjustable straps and combs only lightly.
The wig should sit where it is meant to sit without extreme tension. If the cap cannot cover your hairline, pulls behind your ears, slips back immediately, or feels painfully tight, it may be the wrong size or shape for you.
Fit problems matter because a wig that is too tight can cause discomfort and edge tension, while a wig that is too loose may not stay secure without extra adhesive or bands.
Step 5: Do a Light Shedding Check
Run your fingers gently through the hair from mid-length to ends. Then lightly lift a small section near the lace and see whether hair is sliding out from the roots.
A few loose strands can be normal after packaging. Heavy shedding straight out of the box is different. If you see clumps, short broken hairs, or hair releasing from the lace with almost no tension, record a video before brushing more.
Step 6: Check the Smell and Texture
A new wig may have a packaging scent, but it should not smell moldy, smoky, sour, or aggressively chemical. A strong odor can sometimes be removed by washing, but washing may affect return eligibility.
Feel the hair as well. Human hair does not have to feel like silk in every texture, but it should not feel sticky, coated, crunchy, or severely tangled before use.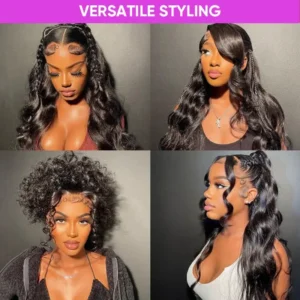
Step 7: Inspect the Inside of the Cap
Turn the wig inside out. Look at the seams, tracks, combs, elastic band, adjustable straps, and lace area.
Check whether the construction matches the product page. If a wig was described as a lace front, look for how much lace actually runs across the front. If it was described as a closure wig, check the closure size. If it was sold as glueless, check whether it has the expected band, combs, or secure cap features.
What Sellers May Not Explain
Some listings focus on finished install photos, not the condition of the wig before customization. A wig can look beautiful after professional plucking, tinting, adhesive, makeup, and styling, but that does not mean every buyer receives a ready-to-wear result out of the box.
Return policies may also use words like unused, unaltered, unworn, uncut, and original condition. These terms matter. Cutting lace, bleaching knots, tinting lace, washing, adding product, removing tags, or heat styling may give the seller a reason to deny a return.
What to Document Before Contacting the Seller
Take clear photos of:
- The package label and order number, if safe to show privately to the seller
- The wig in its original packaging
- The lace front and parting area
- The inside of the cap
- Any tears, holes, stains, shedding, or construction issues
- A no-filter photo in natural light
- A short video showing fit or shedding problems
Keep your message factual. Instead of saying “this wig is bad,” say what does not match the order or what defect you found.
Should You Try to Fix It Yourself?
Only try simple styling fixes if you are sure you want to keep the wig. For example, minor frizz, a slightly flat part, or a light packaging scent may be manageable after washing and styling.
Do not try to repair torn lace, severe shedding, wrong cap size, wrong construction, or major density mismatch before speaking with the seller. Fixing it yourself can remove evidence and may reduce your return options.
Final Verdict
If the wig is new, untouched, and you are already asking, “Should I return this wig?”, pause before cutting the lace. A ten-minute inspection can protect your money, your return rights, and your styling time.
Keep the wig in original condition, document what you see, compare it with the product listing, and contact the seller if the issue is structural, not just styling-related.
FAQ
Can I return a wig after cutting the lace?
It depends on the seller, but many wig return policies become stricter after the lace is cut. Always check the policy before cutting, plucking, tinting, washing, or installing the wig.
Is shedding normal in a new wig?
A few loose hairs from packaging can be normal. Heavy shedding, clumps, or hair coming out from the lace with light touch is a red flag.
Should I wash the wig before deciding to return it?
Not unless the seller tells you to. Washing can count as altering or using the wig, so document the issue first and contact the seller.
What if the wig looks different from the model photo?
Some difference is normal because lighting, styling, density, and professional installation affect the final look. But if the construction, length, color, lace size, or cap type does not match the listing, document it.
Should I cut the lace just to see how it looks?
No. Try the wig on gently with the lace intact. If you are unsure about keeping it, leave the lace uncut.